Getting Started
Prerequisites
- API Key for your chosen AI provider (Anthropic recommended)
After installing, run pensar doctor to check for optional dependencies (like
nmap) and install them automatically.
Installation
Install Apex using your preferred method:
macOS/Linux
Homebrew
Windows
npm
bash curl -fsSL https://pensarai.com/install.sh | bash
Apex is now installed! You can run it from anywhere by typing pensar in your
terminal.
Configuration
Before running Apex, you need to configure your AI provider API key. Apex supports multiple providers, but Anthropic is recommended for best results.
Anthropic (Recommended)
Get your API key from console.anthropic.com.
Anthropic models (especially Claude Sonnet 4.5) provide the best performance for penetration testing tasks.
OpenAI
Get your API key from platform.openai.com.
Apex uses GPT 5.5 as the default OpenAI model when OpenAI is your highest-priority configured provider.
Google
Get your API key from aistudio.google.com.
Google provides access to Gemini models through the Generative AI API.
OpenRouter
Get your API key from openrouter.ai.
OpenRouter provides access to multiple AI models through a single API.
AWS Bedrock
Configure AWS credentials with Bedrock access.
Ensure you have access to Anthropic Claude models in AWS Bedrock.
Pensar Console (Managed)
Use the /login command inside Apex to connect to Pensar Console for managed inference — no API key required.
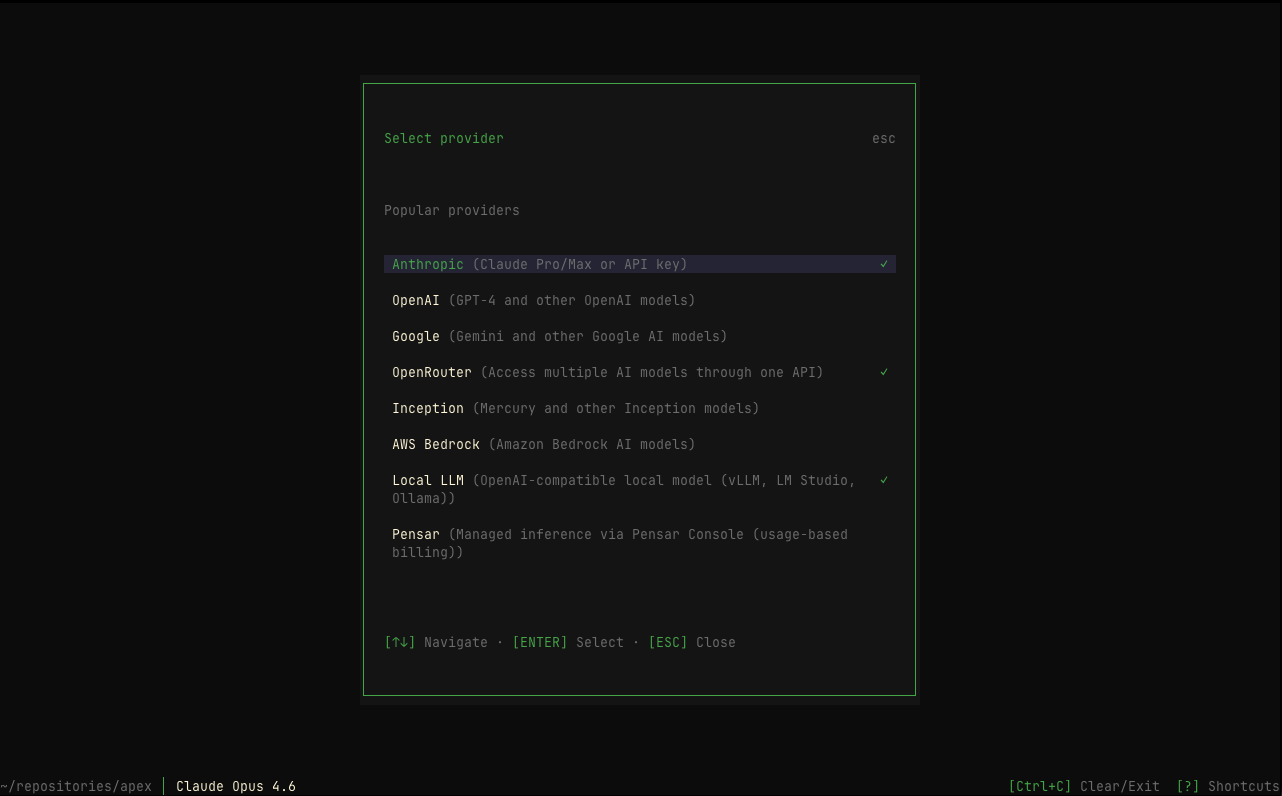
Tip: You’ll configure your API key directly in Apex using the /providers
command — no environment variables needed!
Running Apex
Launch Apex by running:
This will start the interactive terminal interface where you can access all Apex commands.
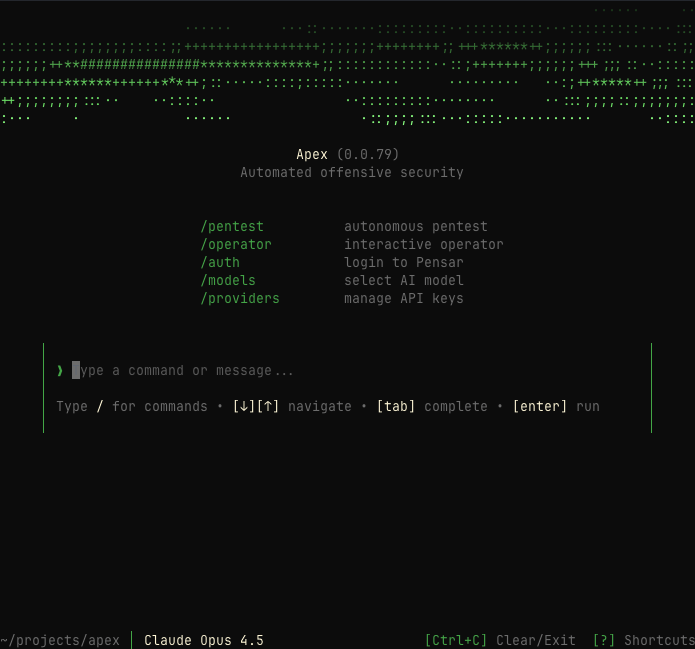
CLI Commands
Apex also supports headless CLI commands for CI/CD and scripting:
Using Kali Linux Container (Optional)
For best performance and maximum compatibility with security tools, we recommend running Apex in the included Kali Linux container:
Linux Users: Consider using network_mode: host in docker-compose.yml
for comprehensive network scanning capabilities.
First Steps
Now that Apex is installed, here’s how to get started:
Launch an autonomous penetration testing swarm against your target.
Start an interactive operator session with step-by-step control.
Connect your AI provider and configure API keys.
Select which AI model to use for testing.
Next Steps
Learn about all available commands in Apex.
Configure your AI provider for testing.
Choose the right AI model for your needs.
Launch your first penetration test.
Need Help?
If you encounter any issues or have questions, reach out to our support team at team@pensarai.com.